

How to Buy Property in Karnataka: 25-Step Buyer Guide

Quick answer: Buying property in Karnataka runs through roughly 25 steps: fixing budget, shortlisting locality, verifying Khata and title, obtaining a 30-year encumbrance certificate, checking RERA registration if under construction, negotiating price, arranging finance, paying stamp duty, registering at the Sub-Registrar, and completing Khata transfer after registration.
Published: 24 March 2026 | Updated: 11 July 2026 | By L K Monu Borkala
Buying property in Karnataka involves more distinct steps than most first-time buyers expect, and skipping any one of them is exactly how people end up with title disputes, unexpected tax bills, or a Khata that never gets transferred into their name. This guide walks through the process in the actual order it happens, from the first budget conversation to the final utility transfer, with a direct link to the relevant government portal at each step where one exists.
This guide covers the process broadly enough to apply whether you're buying a ready apartment, an under-construction unit, a plot, or a resale property, though the specific weight you should put on each step shifts depending on which of these you're pursuing. Where a step applies specifically to one property type rather than all of them, that's noted directly.
Quick Summary: All 25 Steps at a Glance
For a fast overview before the detailed walkthrough: Phase 1 (Planning) - set your budget, decide property type, choose location, shortlist online. Phase 2 (Verification) - verify RERA, visit the site, check title and Encumbrance Certificate, check Khata and property tax, verify Bhoomi records for plots, check building plan and Occupancy Certificate, confirm layout approval authority, verify water and electricity, get an independent legal opinion. Phase 3 (Agreement) - negotiate and get it in writing, arrange home loan pre-approval, sign the sale agreement. Phase 4 (Registration) - pay stamp duty, book your Sub-Registrar appointment, complete registration. Phase 5 (Post-Registration) - apply for mutation, transfer Khata, transfer utilities, file TDS if applicable, set up property tax in your name, keep a complete document file.
Phase 1 of 5: Planning & Budget

Step 1: Set a Real Budget, Not Just a Purchase Price
Your budget needs to cover more than the property's quoted price. Add stamp duty and registration (roughly 6 to 7 percent of the transaction value in Karnataka, varying by slab and gender-based concessions), legal fees, brokerage if applicable, GST on under-construction properties, and a contingency for the property tax and utility transfer costs you'll encounter after registration. A buyer who budgets only for the headline price routinely finds themselves 8 to 10 percent short at the point of registration. Our stamp duty calculatorgives you an exact figure rather than a rough percentage.
As a rough working figure, budget an additional 10 to 12 percent over the property's quoted price to cover stamp duty, registration, legal fees, and the first year of Khata and utility transfer costs combined. For under-construction properties, also factor in GST at the applicable rate, which does not apply to ready-to-move properties with an Occupancy Certificate already issued, a distinction many first-time buyers miss when comparing two otherwise similar listings.
Step 2: Decide Property Type and Purpose First
An apartment, a villa, and a plot involve different due diligence processes, different ongoing costs, and different resale outcomes. Decide early whether you're buying to live in or purely to invest, since that changes how much weight you should put on rental yieldversus personal preference in the steps that follow. This decision should come before you start shortlisting, not after, since it changes which of the later verification steps apply to you. If you're newer to property investment generally, our guide to how real estate investment actually works in Bangaloreis worth reading alongside this one.
Step 3: Choose Your Location Based on Your Actual Priorities
Commute time to your workplace, proximity to schools if relevant, and your genuine budget ceiling should drive location choice more than a corridor's reputation. Bangalore's growth corridors each have distinct trade-offs between price, connectivity, and how established the surrounding infrastructure already is; a five-minute drive at midday tells you very little about the same route during actual peak hours. Our broader guide to real estate investment opportunities across Bangalore's best areasis a useful starting point for this comparison. If you have children, map the actual school run separately from your own commute, since these two routes rarely overlap as neatly as a location's marketing suggests.
Step 4: Shortlist and Do Preliminary Online Research
Before visiting anywhere in person, shortlist based on publicly available information: builder reputation, project RERA status, and price trends for the specific micro-market. This narrows your site visits to viable options rather than spending weekends on properties that fail basic checks you could have done from your desk. Cross-check a builder's claimed delivery track record against independent sources rather than only the testimonials on their own website, since a developer's self-reported history is, understandably, never the full picture.
Phase 2 of 5: Due Diligence & Verification

Step 5: Verify RERA Registration Directly
Every project above the threshold unit and area size must be registered with Karnataka RERA before the developer can advertise or accept bookings. Search the project by name or RERA number directly on the Karnataka RERA portalrather than trusting a developer's brochure or a broker's verbal assurance. Confirm the registration is current, matches the exact tower or phase you're considering, and check the promised possession date against what the sales team is telling you. Our broader look at how RERA affects property transactions in Karnatakacovers what this registration actually protects you from.
Step 6: Visit the Site More Than Once, at Different Times
A single daytime visit tells you almost nothing about actual traffic, noise levels, or water pressure during peak usage hours. Visit at your own likely commute time, and if possible, once after dark to check street lighting and general safety of the approach road. For resale properties, ask to see the building during a period of heavy rain if you're buying during monsoon season, since this is when drainage and waterproofing problems actually surface. Our guide on checking whether a specific property floodscovers this in more depth.
If you're buying an apartment specifically, ask a current resident, not the sales team, about actual lift wait times, water pressure on upper floors, and how the building handles the monsoon. Residents will generally give you a more honest picture than anyone with a financial stake in your decision.
Step 7: Verify the Land Title Chain and Get an Encumbrance Certificate
Before you get emotionally attached to a specific property, verify that the seller owns clear, marketable title. Request an Encumbrance Certificatecovering at minimum the last 15 years, ideally 30, through the Kaveri Online Services portal. This document shows whether the property carries any registered loans, mortgages, or legal claims, and is one of the single most important checks in the entire process. Our guide to checking land title and RERA approval for plotsgoes deeper on this specifically for plotted developments. Order a fresh EC close to your actual registration date, since an EC obtained months earlier may not reflect a lien added since.
Step 8: Check the Khata and Property Tax Records
Confirm the property has a valid Khata (A-Khata for fully compliant properties, B-Khata for properties with certain regularisation pending) and that property tax has been paid up to date, with no outstanding dues in arrears. For properties within Bangalore's municipal limits, this is checked through the e-Aasthi portal, while current property tax payment status and any pending dues are checked through the BBMP/GBA property tax portal. A B-Khata property isn't necessarily a dealbreaker, but it does affect your ability to get a home loan and your resale pool later, so go in with clear eyes about which one you're buying. If you're unclear on the distinction, our guide to Khata certificate versus Khata extractexplains it in full.
Step 9: Verify Bhoomi Land Records for Plots and Converted Land
If you're buying a plot, or an apartment on land that was originally agricultural, verify the RTC (Record of Rights, Tenancy and Crops) and mutation status through the Bhoomi portal. Confirm the land has been properly converted from agricultural to non-agricultural use if applicable, and that the survey number on your documents matches the actual physical plot boundaries, not just the seller's verbal description. A mismatch between the documented survey number and the physical plot you've walked is one of the most common sources of plot-related disputes in Bangalore's peripheral growth areas specifically, and it's a check that takes minutes but is skipped surprisingly often.
Step 10: Check Building Plan Sanction and Occupancy Certificate
For an apartment or built villa, request the sanctioned building plan and confirm the actual constructed structure matches what was approved, since unauthorised deviations can create real problems at resale or with your home loan. For a ready property, insist on seeing the Occupancy Certificate before finalising, since a building without a valid OC cannot legally be occupied, regardless of how long people have already been living there.
Step 11: Confirm the Layout Approval Authority for Plots
Plotted developments in and around Bangalore fall under different approving authorities depending on exact location: BDA, BMRDA, or, for areas now under the restructured civic administration, the relevant authority within the Greater Bengaluru Authorityframework. Confirm which authority approved your specific layout, and that the approval is genuine and current, our list of RERA-approved plotted developments in North Bangaloreis a useful reference point if you're specifically comparing plot options, since plots in unapproved or revenue layouts carry meaningfully higher long-term risk around Khata and loan eligibility. Our look at why BDA sites are considered a safer investmentexplains why this specific check matters so much for plots.
Step 12: Verify Water and Electricity Connection Status
Check whether the property has a legitimate water connection, and how dependent it is on borewell or tanker supply rather than piped municipal supply, through the BWSSB portal. Separately, confirm the electricity connection is properly registered in the current owner's name and not carrying unpaid dues, via the BESCOM portal. Both of these are easy to overlook during the excitement of finalising a purchase, and both become your direct problem the day after you move in if left unchecked.
Step 13: Get an Independent Legal Opinion
Beyond your own document checks, engage a property lawyer independent of the seller or broker to review the full title chain and confirm there's no pending litigation, family dispute, or unresolved succession issue attached to the property. This costs a modest amount relative to the transaction size and is cheap insurance against the kind of dispute that can take years to resolve in court.
Specifically ask your lawyer to confirm there's no pending litigation, no unresolved partition or succession dispute among family members if the seller inherited the property, and that any prior loans against the property have been closed and released, not merely marked as settled without the corresponding charge being formally lifted.
Phase 3 of 5: Agreement & Financing
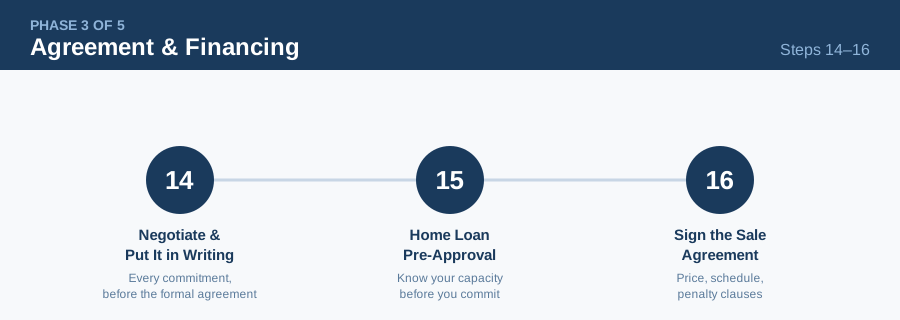
Step 14: Negotiate and Get Everything in Writing
Once due diligence is satisfactory, negotiate price based on comparable transactions in the immediate area, not just the seller's asking price or a broker's suggestion. Whatever is agreed, whether on price, included fixtures, or timeline, should go into writing immediately, even before the formal sale agreement, since verbal understandings are the single most common source of disputes later in the process. This includes any commitments around amenities, parking allocation, or specific finishes that were promised verbally during your site visits but don't automatically appear in a standard template agreement.
Step 15: Arrange Home Loan Pre-Approval
If financing your purchase, get pre-approval from your bank or lender before you commit to a specific property, so you know your actual borrowing capacity and can move quickly once you've finalised a choice. Our home loan EMI calculatorhelps you work out realistic monthly numbers before you talk to a bank. The bank will conduct its own legal and technical verification of the property, which is a useful second check layered on top of your own, though it shouldn't be treated as a substitute for your independent legal review.
A Note for NRI Buyers Specifically
If you're purchasing from outside India, every verification step above still applies, and several become harder to complete personally. Appoint a trusted representative with a registered Power of Attorney specifically for the transaction if you can't be physically present for site visits or the final registration, and confirm your bank's NRI home loan process separately, since documentation requirements differ from a resident buyer's standard application. Our full NRI property buying guidecovers FEMA, RERA, and e-Khata considerations specific to NRI buyers. Budget extra time for each government portal interaction, since OTP-based verification tied to an Indian mobile number is standard across most of these systems.
Step 16: Review and Sign the Sale Agreement
The sale agreement should specify the agreed price, payment schedule, possession or registration timeline, and clear penalty clauses if either party fails to perform. Read this document as carefully as the sale deed itself, since it's the legally binding commitment that governs everything between now and the actual registration.
Phase 4 of 5: Registration
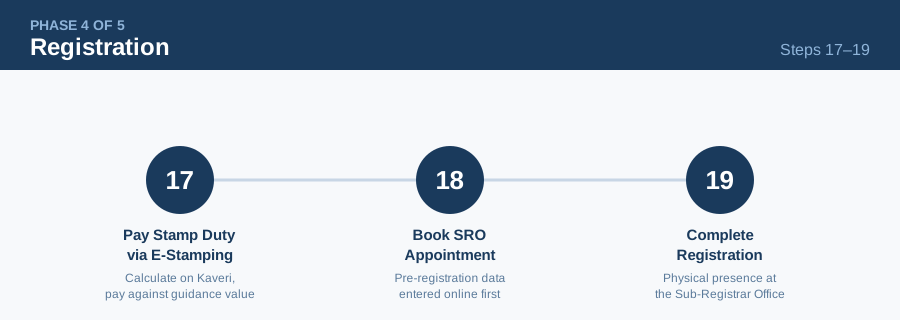
Step 17: Calculate and Pay Stamp Duty via E-Stamping
Calculate your exact stamp duty and registration fee liability using the calculator on the Kaveri Online Services portal, based on whichever is higher between your agreed transaction value and the government guidance value for that location. Pay this through the portal's e-stamping facility, which has replaced physical stamp paper for most transactions. For a deeper walkthrough of this specific step, see our dedicated guide to property registration in Karnataka.
As a general reference, Karnataka's stamp duty currently runs in the range of 3 to 5 percent depending on the property's value slab, with an additional 2 percent registration fee plus applicable cess and surcharge on top, though these exact figures are revised periodically and should always be confirmed on the portal at the time of your specific transaction rather than assumed from a previous purchase or a friend's experience.
Step 18: Book Your Registration Appointment
With pre-registration data entered and stamp duty paid, book your appointment slot at the relevant Sub-Registrar Office through the same Kaveri portal. Since the Kaveri 2.0 upgrade, most of the data entry happens online in advance, meaning your actual time at the SRO should be limited to biometric verification and final signatures rather than a full day of paperwork.
Step 19: Complete Registration at the Sub-Registrar Office
Both buyer and seller, along with witnesses, need to be physically present at the SRO for the final registration, with original identity documents. Verify the final sale deed content matches what was agreed before signing, since this document, once registered, is difficult and expensive to amend.
Phase 5 of 5: Post-Registration
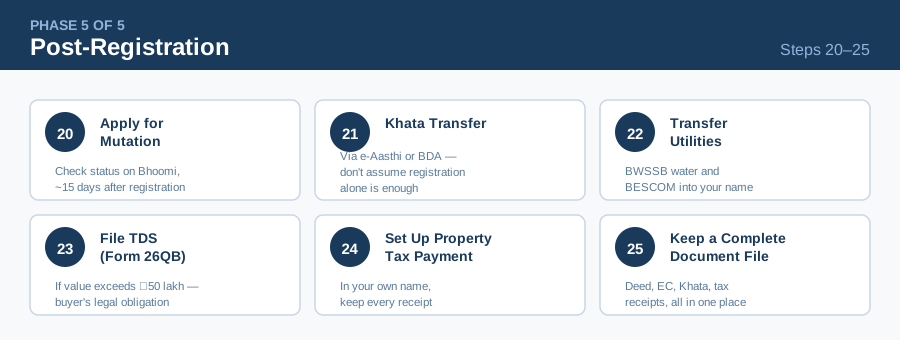
Step 20: Apply for Mutation of Land Records
Following registration, apply for mutation on the Bhoomi portal to update the revenue records to reflect your ownership. Karnataka's auto-mutation system should update this automatically within roughly 15 days of registration for most transactions, but it's worth checking the mutation status directly on Bhoomirather than assuming it happened, since delays and rejections do occur.
Step 21: Apply for Khata Transfer
Apply to transfer the Khata into your name through the e-Aasthi portalfor properties within Bangalore's municipal limits, or the equivalent process for BDA-layout properties via the BDA property tax portal. This step is frequently delayed by new owners who assume registration alone is sufficient, but an un-transferred Khata will continue showing the previous owner's name on all civic records until you actively complete this step. Our step-by-step walkthrough of applying for e-Khata onlinecovers the exact application process.
Step 22: Transfer Utility Connections Into Your Name
Update the BWSSB water connection and BESCOM electricity connection to reflect your ownership, rather than continuing to operate under the previous owner's account. This matters for billing accuracy and also becomes relevant if you ever need to prove continuous, compliant ownership for a future sale.
Step 23: File TDS if Your Purchase Exceeds 50 Lakh Rupees
If your property's transaction value exceeds 50 lakh rupees, you're required to deduct 1 percent TDS from the payment to the seller and deposit it via Form 26QB on the Income Tax e-filing portal, within the specified deadline. This is a buyer obligation, not a seller one, and missing it carries real penalty exposure, so don't leave it as an afterthought once registration is complete.
Step 24: Set Up Ongoing Property Tax Payment in Your Name
Once your Khata transfer is complete, set up property tax payment under your own name and details going forward, whether through the BBMP/GBA portal or the BDA property tax portal depending on your property's jurisdiction. Our breakdown of what changed after the BBMP-to-GBA transitioncovers this administrative shift in full. Keep every payment receipt, since a complete, unbroken payment history in your own name becomes a genuine asset when you eventually sell.
Step 25: Keep a Complete Document File
Once every step above is complete, assemble a single, organised file containing the registered sale deed, Encumbrance Certificate, Khata certificate, mutation extract, tax receipts, and utility transfer confirmations. This file is what a future buyer's lawyer, or your own bank if you ever need to mortgage the property, will ask for, and having it ready and complete from day one saves considerable stress years down the line.
What Changes If You're Buying Resale Versus New From a Developer
A resale purchase shifts more of the verification burden onto you directly, since there's no RERA registration to lean on and no developer legal team standing behind the transaction. Every step above still applies, but steps 7 through 10 specifically deserve extra scrutiny on a resale, since you're inheriting whatever documentation gaps the current owner has accumulated rather than starting from a developer's clean paperwork. Ask directly why the current owner is selling, and how long they've held the property, since a very short holding period on a resale is worth understanding rather than ignoring.
The Complete Document Checklist
Beyond the documents mentioned at each individual step, and our full list of documents required for property registration, keep this consolidated list handy as you work through the process: original sale deed of the current owner, mother deedtracing earlier ownership history, Encumbrance Certificate, RTC and mutation extract where applicable, Khata certificate and extract, latest property tax paid receipt, approved building plan and Occupancy Certificate for constructed properties, RERA registration certificate for under-construction projects, NOC from the housing society or association if applicable, and identity and address proof for all parties to the transaction. Missing even one of these at the point of registration can mean a wasted trip to the Sub-Registrar Office and a rescheduled appointment.
Timeline Summary: What Happens in Roughly What Order
To place all 25 steps in practical perspective: budget, property type, and location decisions typically take a buyer two to six weeks of genuine consideration. Shortlisting through to a finalised, negotiated agreement runs another two to four weeks once you've started actively viewing properties. Registration itself, once stamp duty is paid and an appointment is booked, generally happens within days rather than weeks. The post-registration steps, mutation, Khata transfer, and utility updates, are where delays most commonly creep in, simply because the urgency buyers feel during the purchase itself tends to fade once the keys are in hand. Treat the post-registration steps with the same discipline as everything before registration, since an incomplete Khata transfer discovered five years later, at your own resale, is a far more expensive problem to fix than a phone call would have been at the time.
Red Flags Worth Stopping For
A seller unwilling to provide an Encumbrance Certificate, or one that shows unexplained gaps in the ownership chain, is worth pausing on regardless of how attractive the price seems. Similarly, a significant, unexplained difference between the seller's asking price and the government guidance value in either direction deserves a direct question rather than an assumption. If a broker actively discourages you from getting an independent legal opinion, treat that discouragement itself as information.
A Note on Why This Process Feels Longer for Karnataka Specifically
Karnataka's property records span multiple, historically separate systems, revenue records under Bhoomi, registration records under the Department of Stamps and Registration, and municipal records under whichever civic body currently governs your specific location. This is more fragmented than some other states, which is exactly why each of the steps above exists as a separate verification rather than a single unified check. The state's ongoing digitisation efforts, Kaveri 2.0, e-Aasthi, auto-mutation, have meaningfully reduced the friction compared to five years ago, but the underlying complexity of multiple record systems hasn't disappeared, it's just become easier to navigate online.
This is also why relying on a single, generic "how to buy property in India" guide rarely serves you well in Karnataka specifically. State-level property law, and particularly the specific government portals involved, differ meaningfully from Maharashtra, Tamil Nadu, or Delhi-NCR, and a guide written for a national audience will inevitably gloss over exactly the state-specific portals and processes covered here.
Frequently Asked Questions
How many days does the full property buying process take in Karnataka, from shortlisting to registration?
For a ready property with clean documentation, the process from finalising a property to completing registration typically takes four to eight weeks, factoring in due diligence, loan approval if financing, and appointment availability at the Sub-Registrar Office. Under-construction properties follow a different, longer timeline tied to the construction-linked payment schedule instead.
Do I need a lawyer if I'm buying a RERA-registered apartment from a reputed builder?
Yes. RERA registration confirms regulatory compliance at the project level, not that your specific unit or the specific tower's title chain is free of complications. An independent legal opinion remains worthwhile regardless of developer reputation.
What's the difference between A-Khata and B-Khata, and does it matter for my purchase?
A-Khata indicates a property fully compliant with all applicable building and layout regulations. B-Khata indicates some regularisation is pending. A B-Khata property is not automatically unsafe to buy, but it typically affects loan eligibility and future resale liquidity, so factor this into your price negotiation rather than treating it as a minor technicality.
Can I complete the entire registration process without visiting Karnataka in person?
No. Physical presence is required at the Sub-Registrar Office for the final registration, though a registered Power of Attorney holder can complete this step on your behalf if you cannot travel.
What happens if the mutation doesn't update automatically after registration?
Check the mutation status directly on the Bhoomi portal roughly 15 to 20 days after registration. If it shows pending beyond 30 days, follow up with the Revenue Inspector at your local Nadakacheri rather than waiting indefinitely for automatic processing.
Is the guidance value the same as the price I'll pay for the property?
No. The guidance value is the government's minimum benchmark valuation for stamp duty purposes. Your actual negotiated price may be higher or lower than the guidance value, but stamp duty is calculated on whichever figure is higher between the two.
Twenty years of doing this in Bangalore has shown that the buyers who skip steps rarely skip the same step twice. The first time it costs them a Khata transfer they have to chase for eighteen months, or a resale that stalls because a mutation was never completed. Treat every step above as mandatory, not optional, regardless of how confident the seller or broker sounds about skipping it. For the wider picture beyond just the buying process, our Bangalore real estate guidecovers locality-level detail and investment considerations.
Featured Projects in This Area
Need expert property advice?
OneCity Property offers independent advisory across Bangalore, Mangalore and Mysore — zero commission for buyers on projects under ₹1 Cr.
💬 WhatsApp Us📞 Call 7676870876


News insight
 31/08/2026
What Homebuyers Should Look for in a Modern Apartment Security System
A guide to evaluating apartment security systems before buying — covering access control, cameras, p...
 25/07/2026
Water Damage and Its Long-Term Impact on Property Value
Water damage can quietly slash a home's resale value. A look at why it happens, the real cost of ign...
 13/07/2026
Bangalore Property Dictionary: Every Term, Process, Measurement, Khata and Registration Rule Explained
The reference for Bangalore real estate in 2026: 60+ terms, Khata system, Bhu Guarantee deadline, me...